DIY Coffee Table

A few years ago, we moved to Seattle for the summer. I had an internship opportunity, and Austin came with me. This was the first time the two of us were living together on our own (we had only lived together with 4 other roommates before this). So we packed up my little Subaru, and trekked up to the city. To minimize our load, we decided we would try to sublet a furnished place, or just craigslist/thrift some cheap furniture when we got a place set up. I still remember how our little pup (she was 5 months old at the time) looked sitting in the back seat with about 3 square feet of room. There were even things balancing above her in the car. When we made it up there and settled on an apartment, we scoped Goodwill and found a $15 coffee table. It was basically the only piece of furniture in that apartment. We sat on large outdoor pillows and slept on a blow up mattress. For three months. We managed to squeeze the coffee table into our car on the trip back (thanks to some of our family coming up to visit and transporting some stuff home in their cars), and it has been with us ever since. This thing has seen better days, and I frankly hated it. It  was cheap and the laminated sides had begun to crack and fall off. I was so excited to be rid of it, that I don’t even have any “before” photos, but this is how we built its replacement.

We purchased some 1″ galvanized piping from the orange store, along with 8 flanges and 4 T-fittings. We decided we would use 36″ pipe for the width runs (stock size) and then use 1 10″ piece and 1 6″ piece for each leg (connected with the T-fitting). We assembled the two legs and spray-painted them.

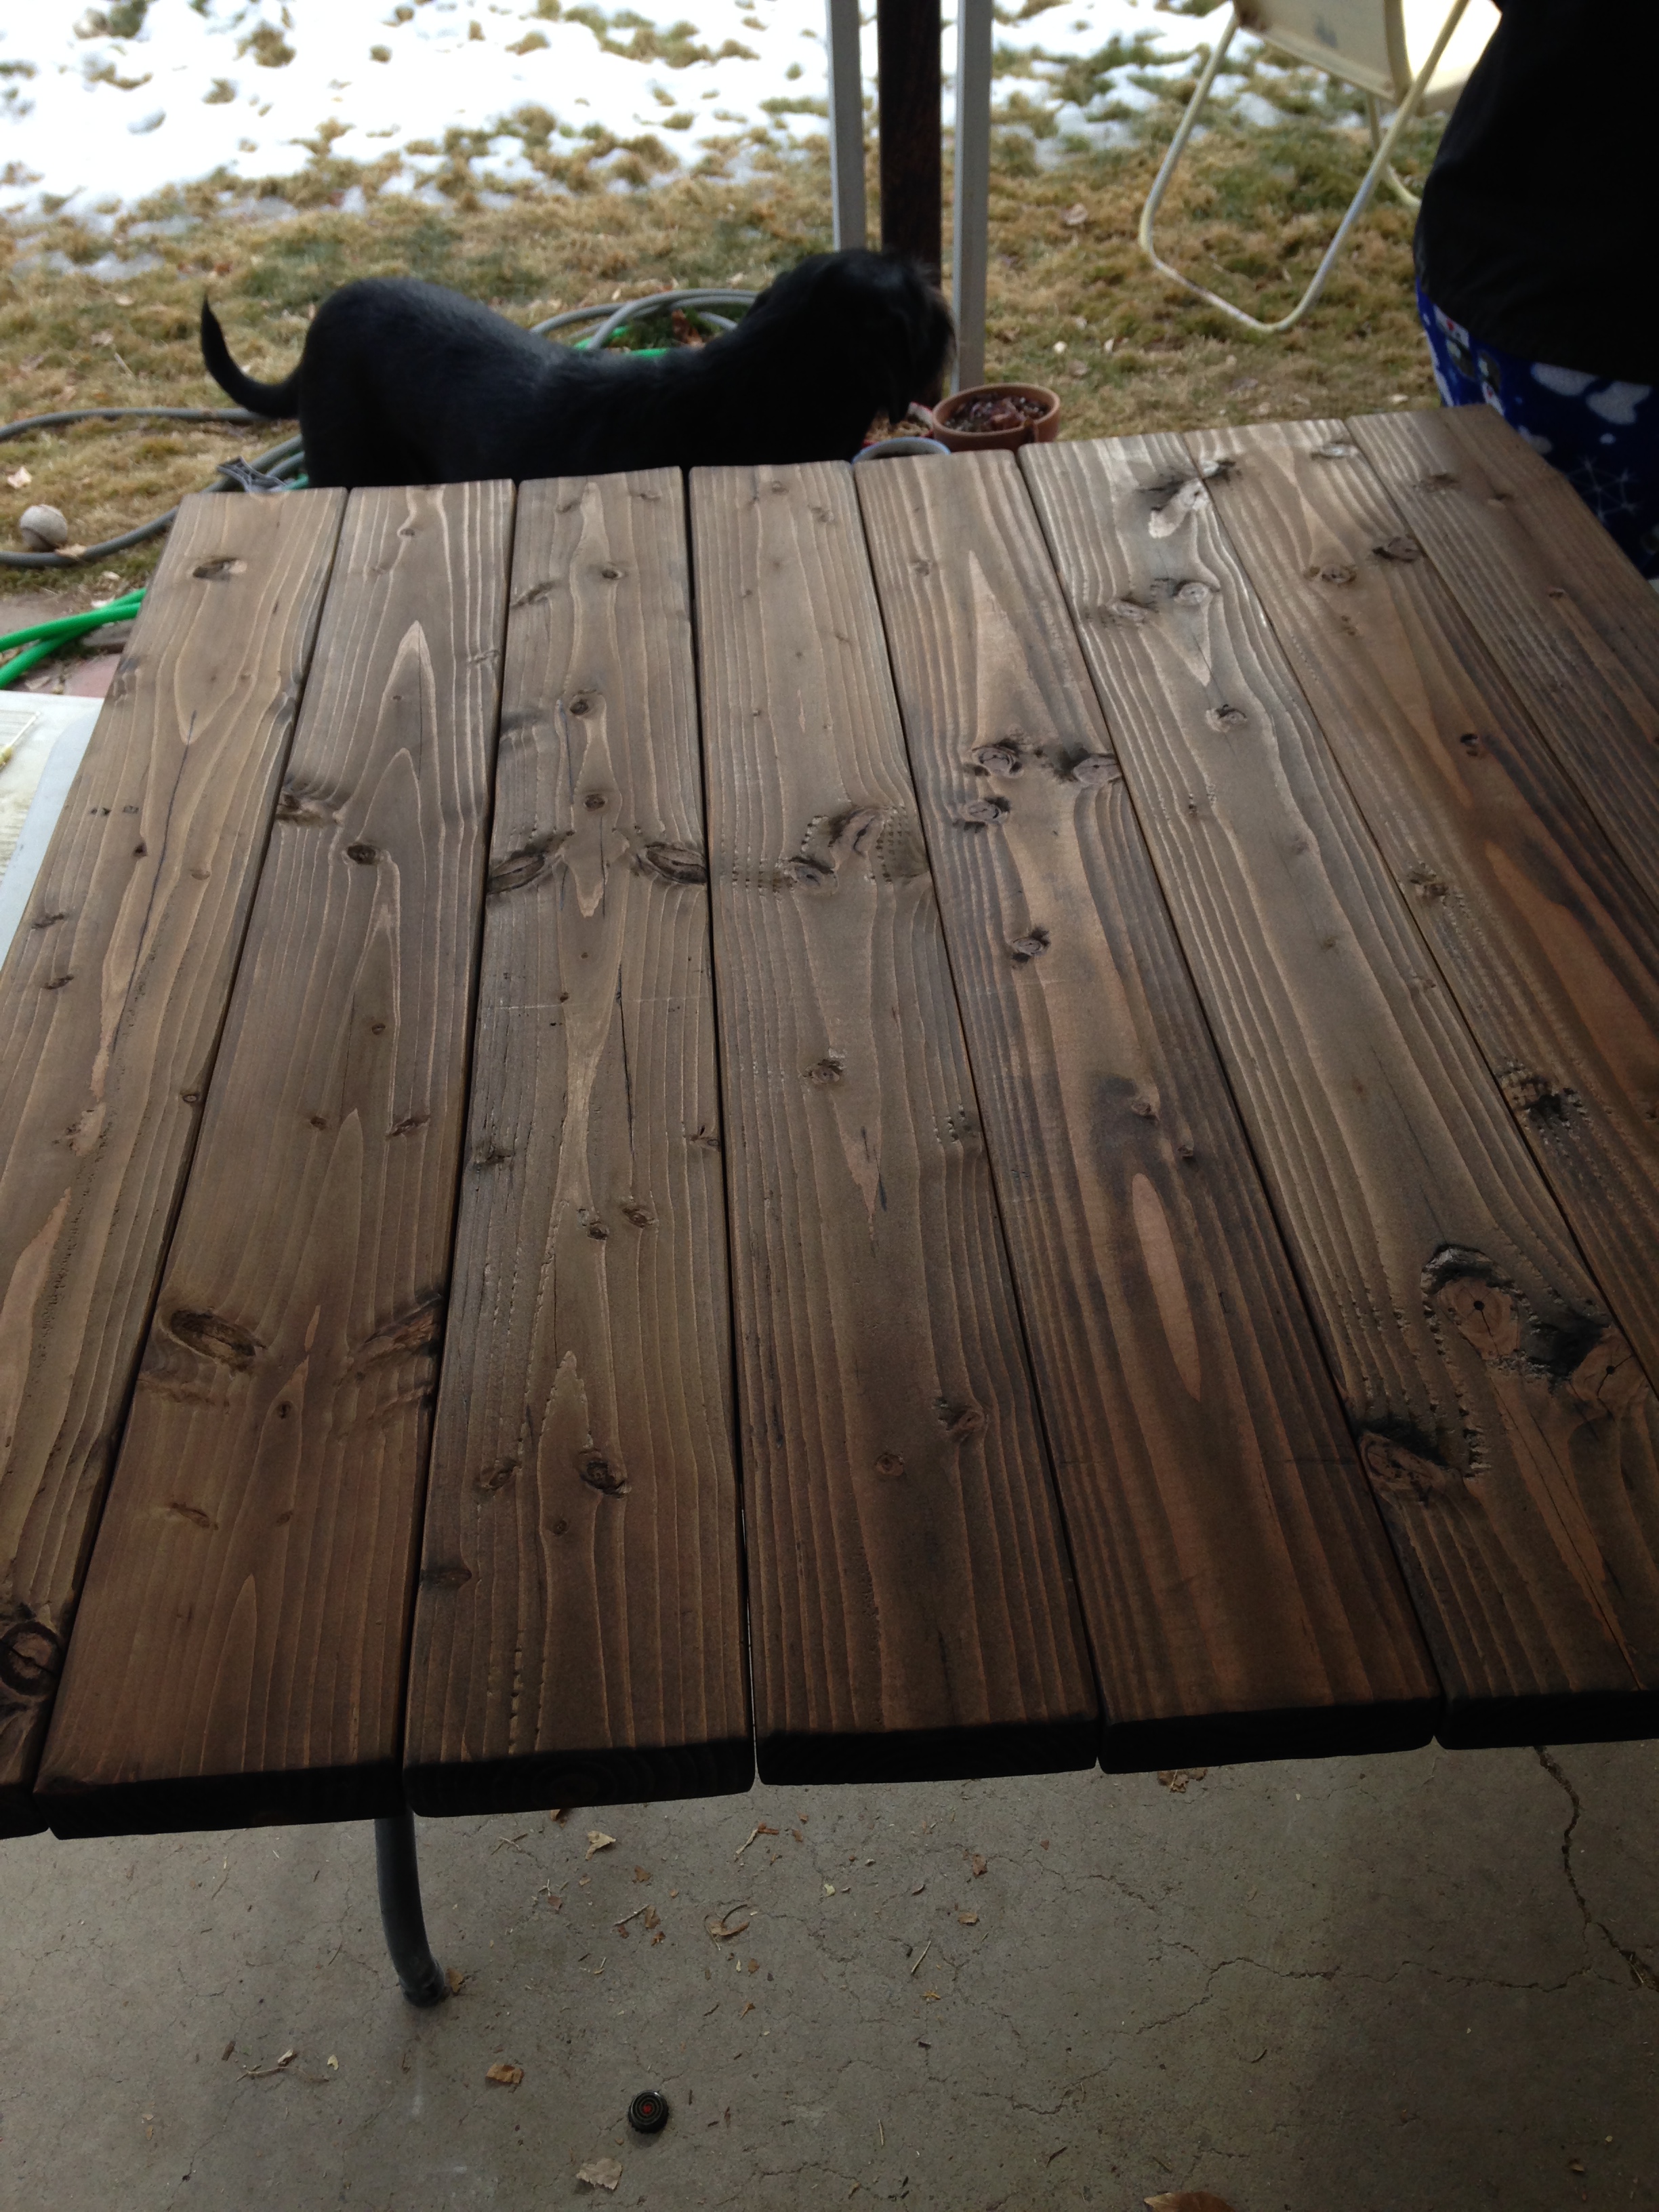
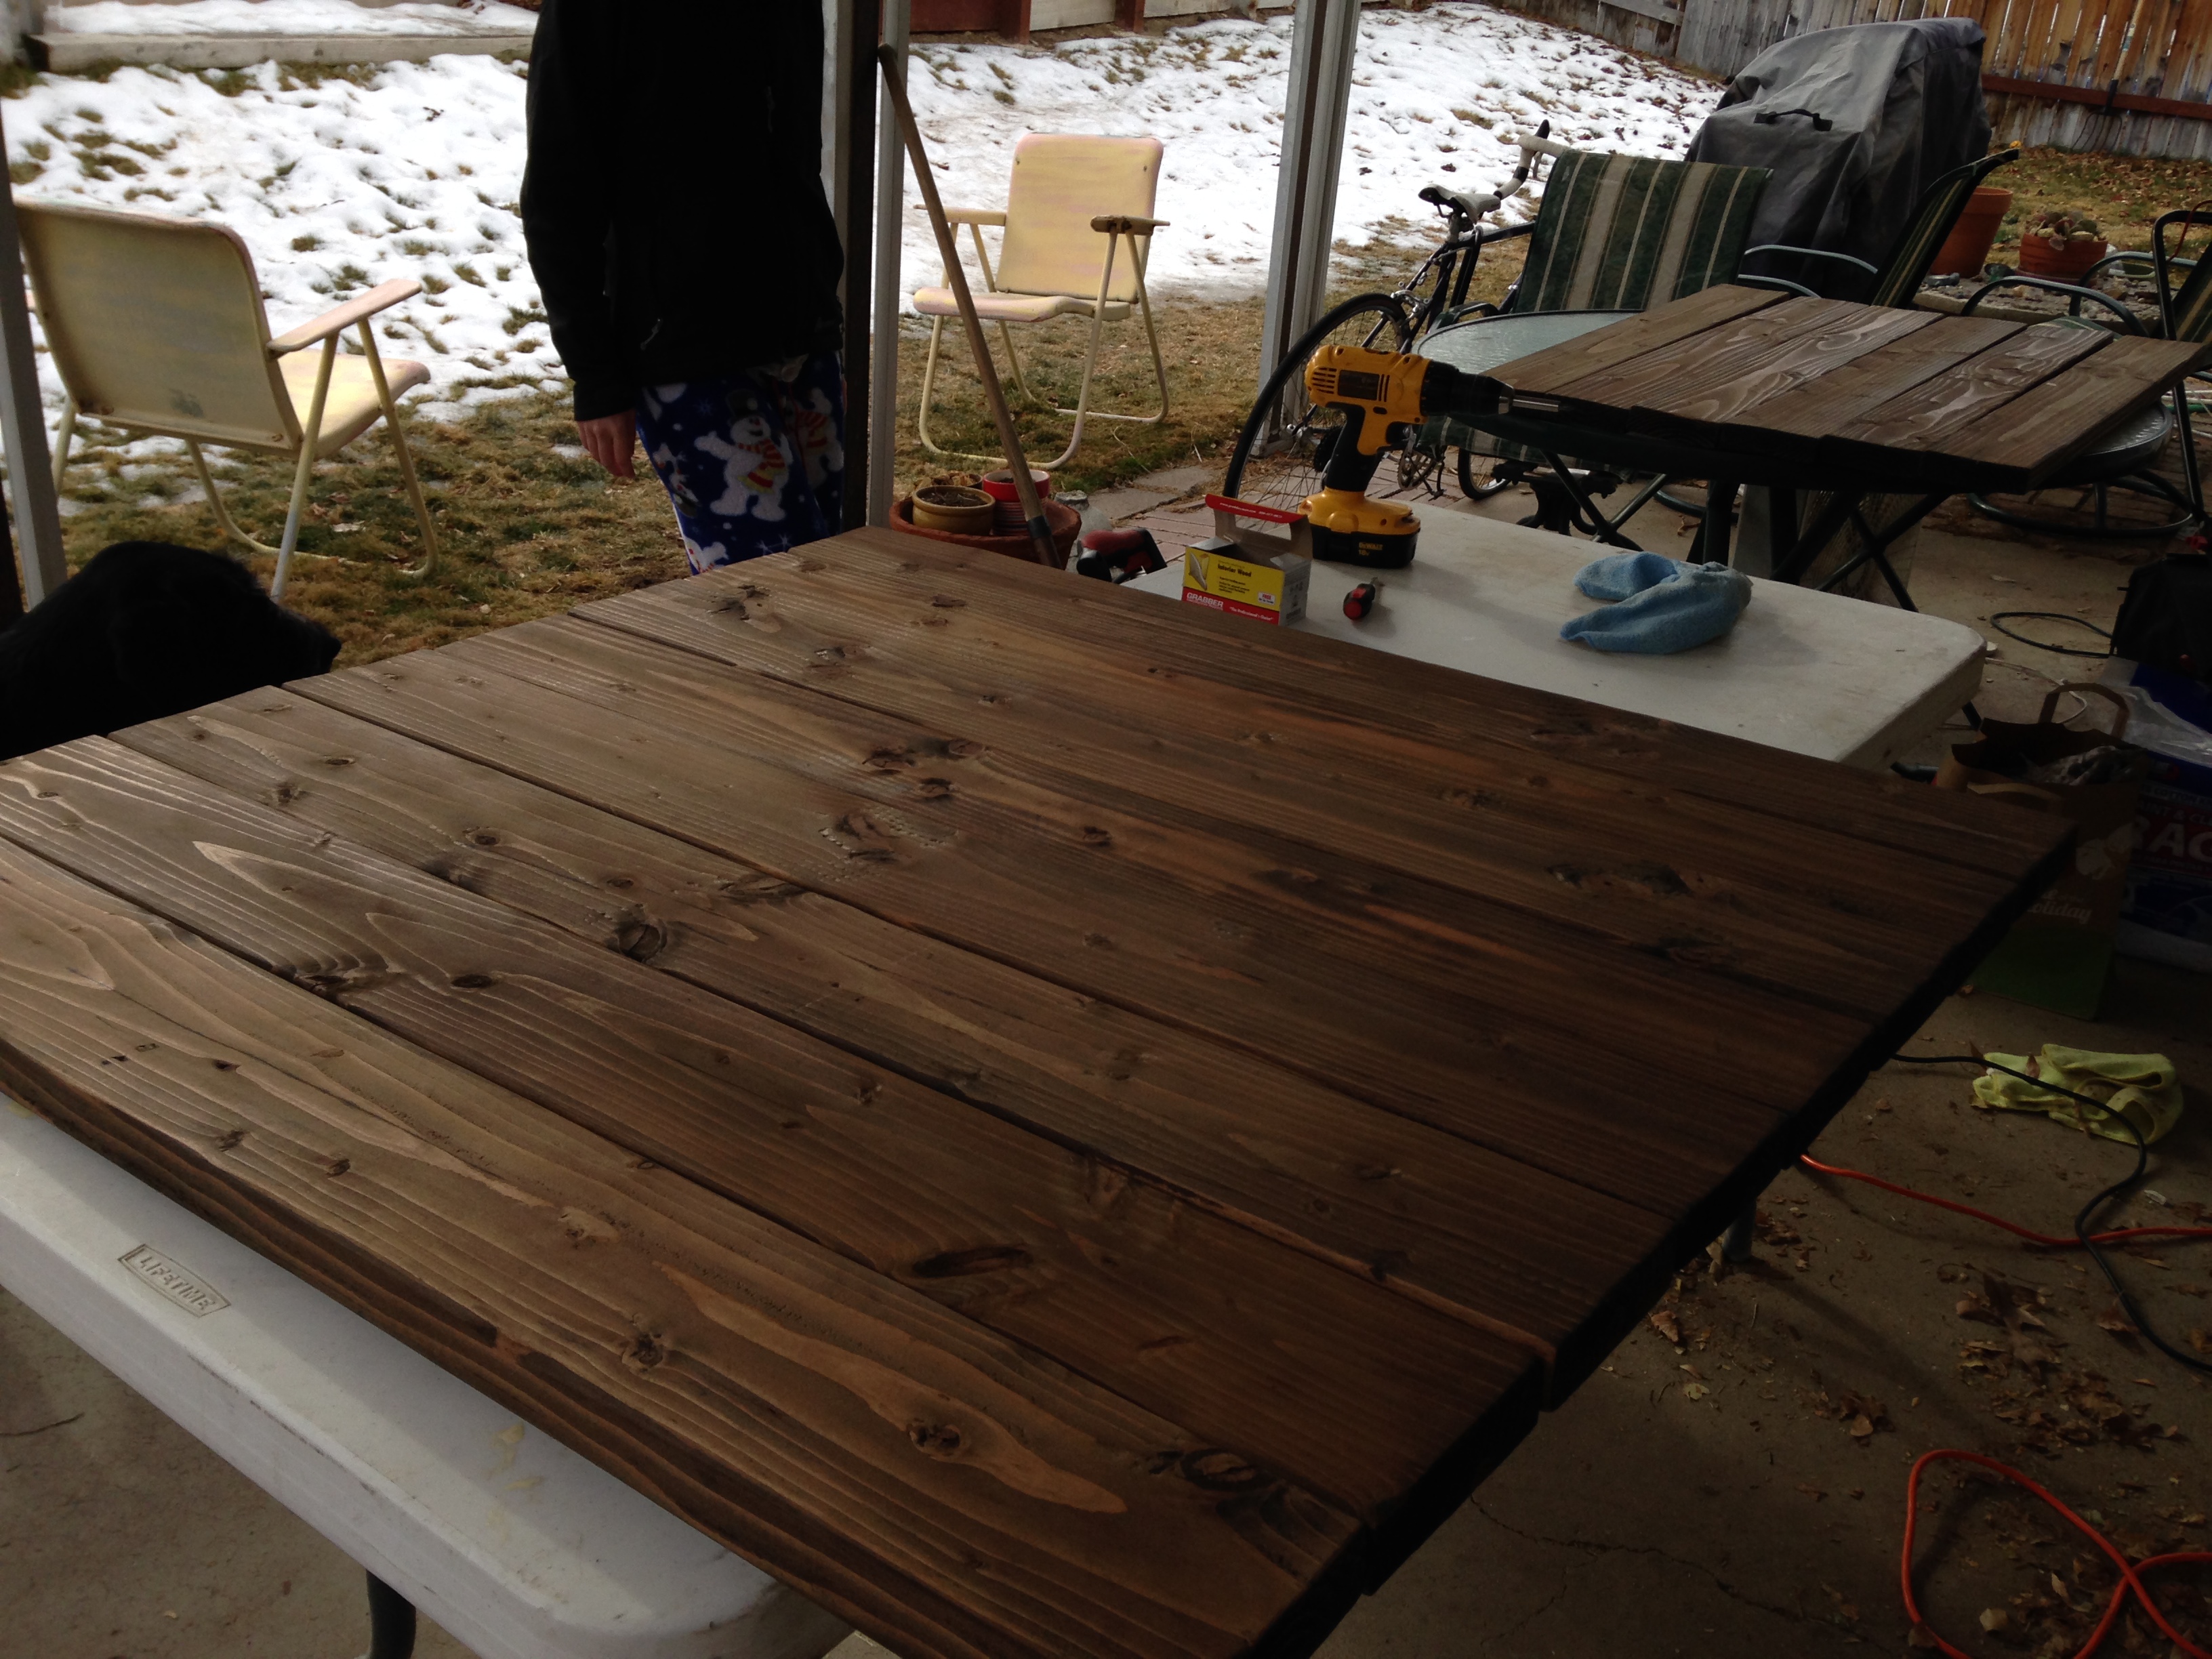
At the orange store, we also picked up some 2″x6″ boards, that we got cut to 48″ lengths. This was before we got our miter saw. We used 8 boards for the table top and 6 boards for the shelf.

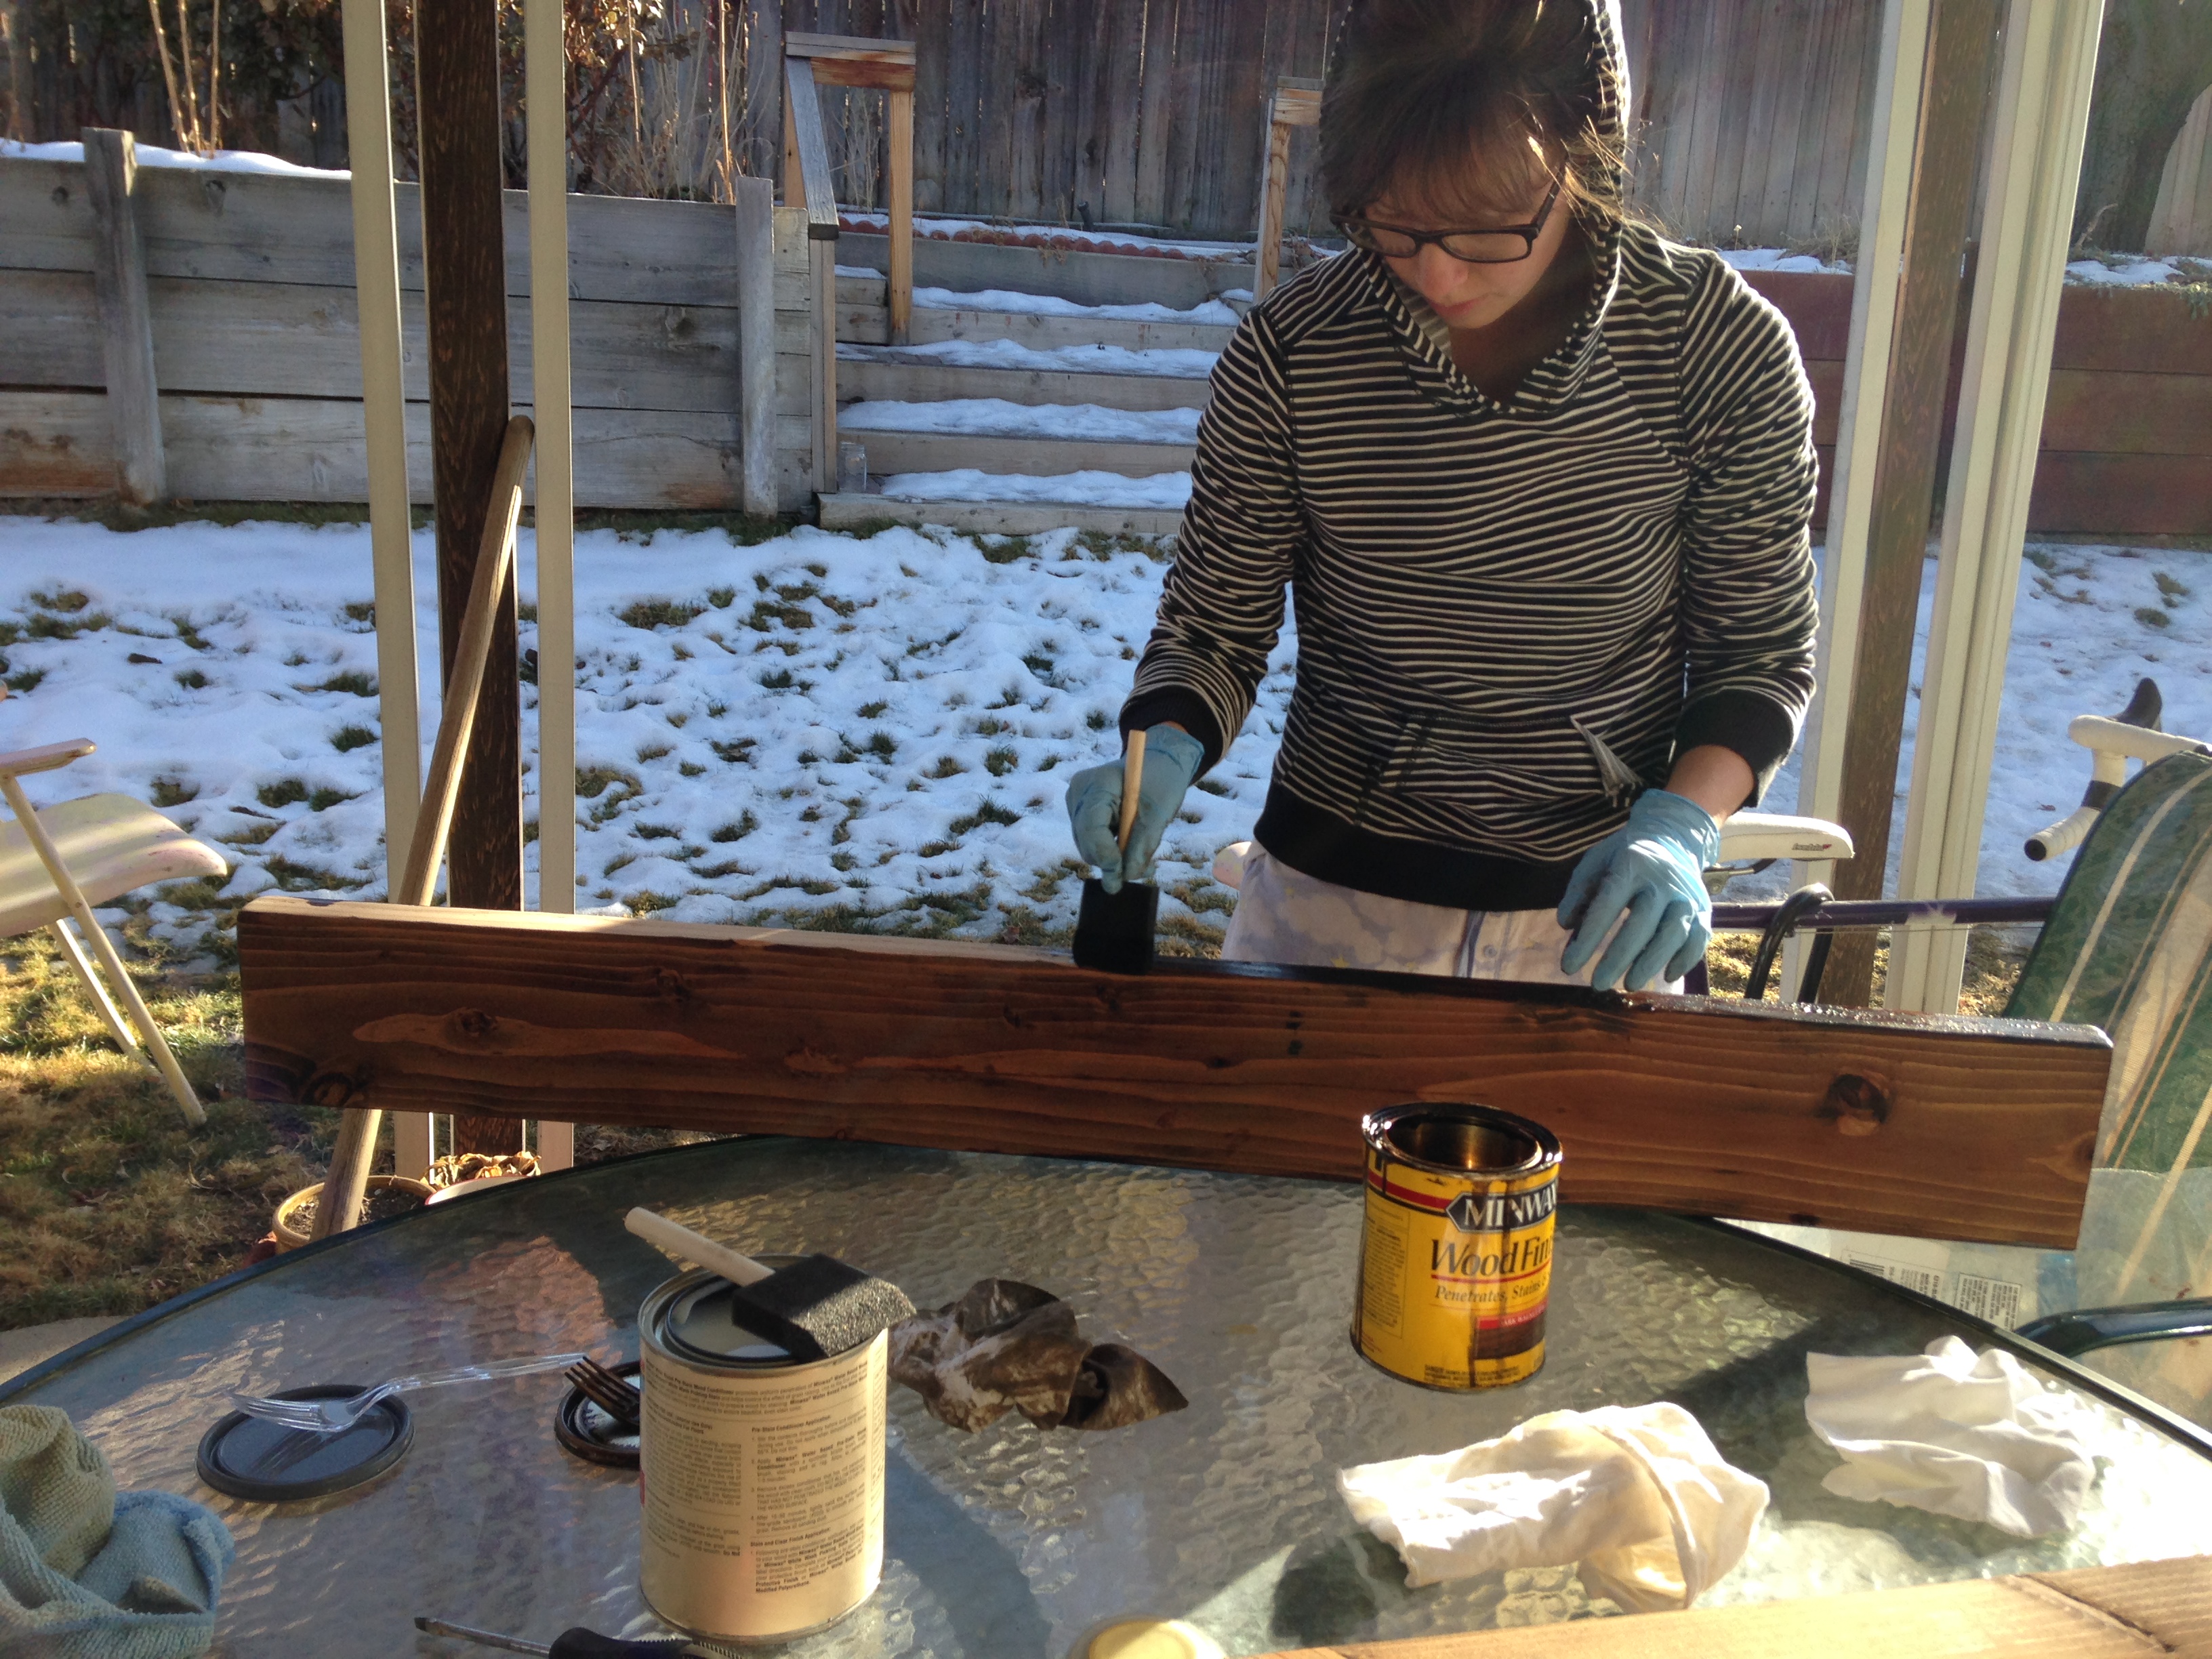
I stained them with Minwax Dark Walnut. In my pajamas.

IMG_0017

The we butted the boards together and attached on the back with a spare 1×4 pine board.

The top.

IMG_0043

The shelf.

IMG_0044

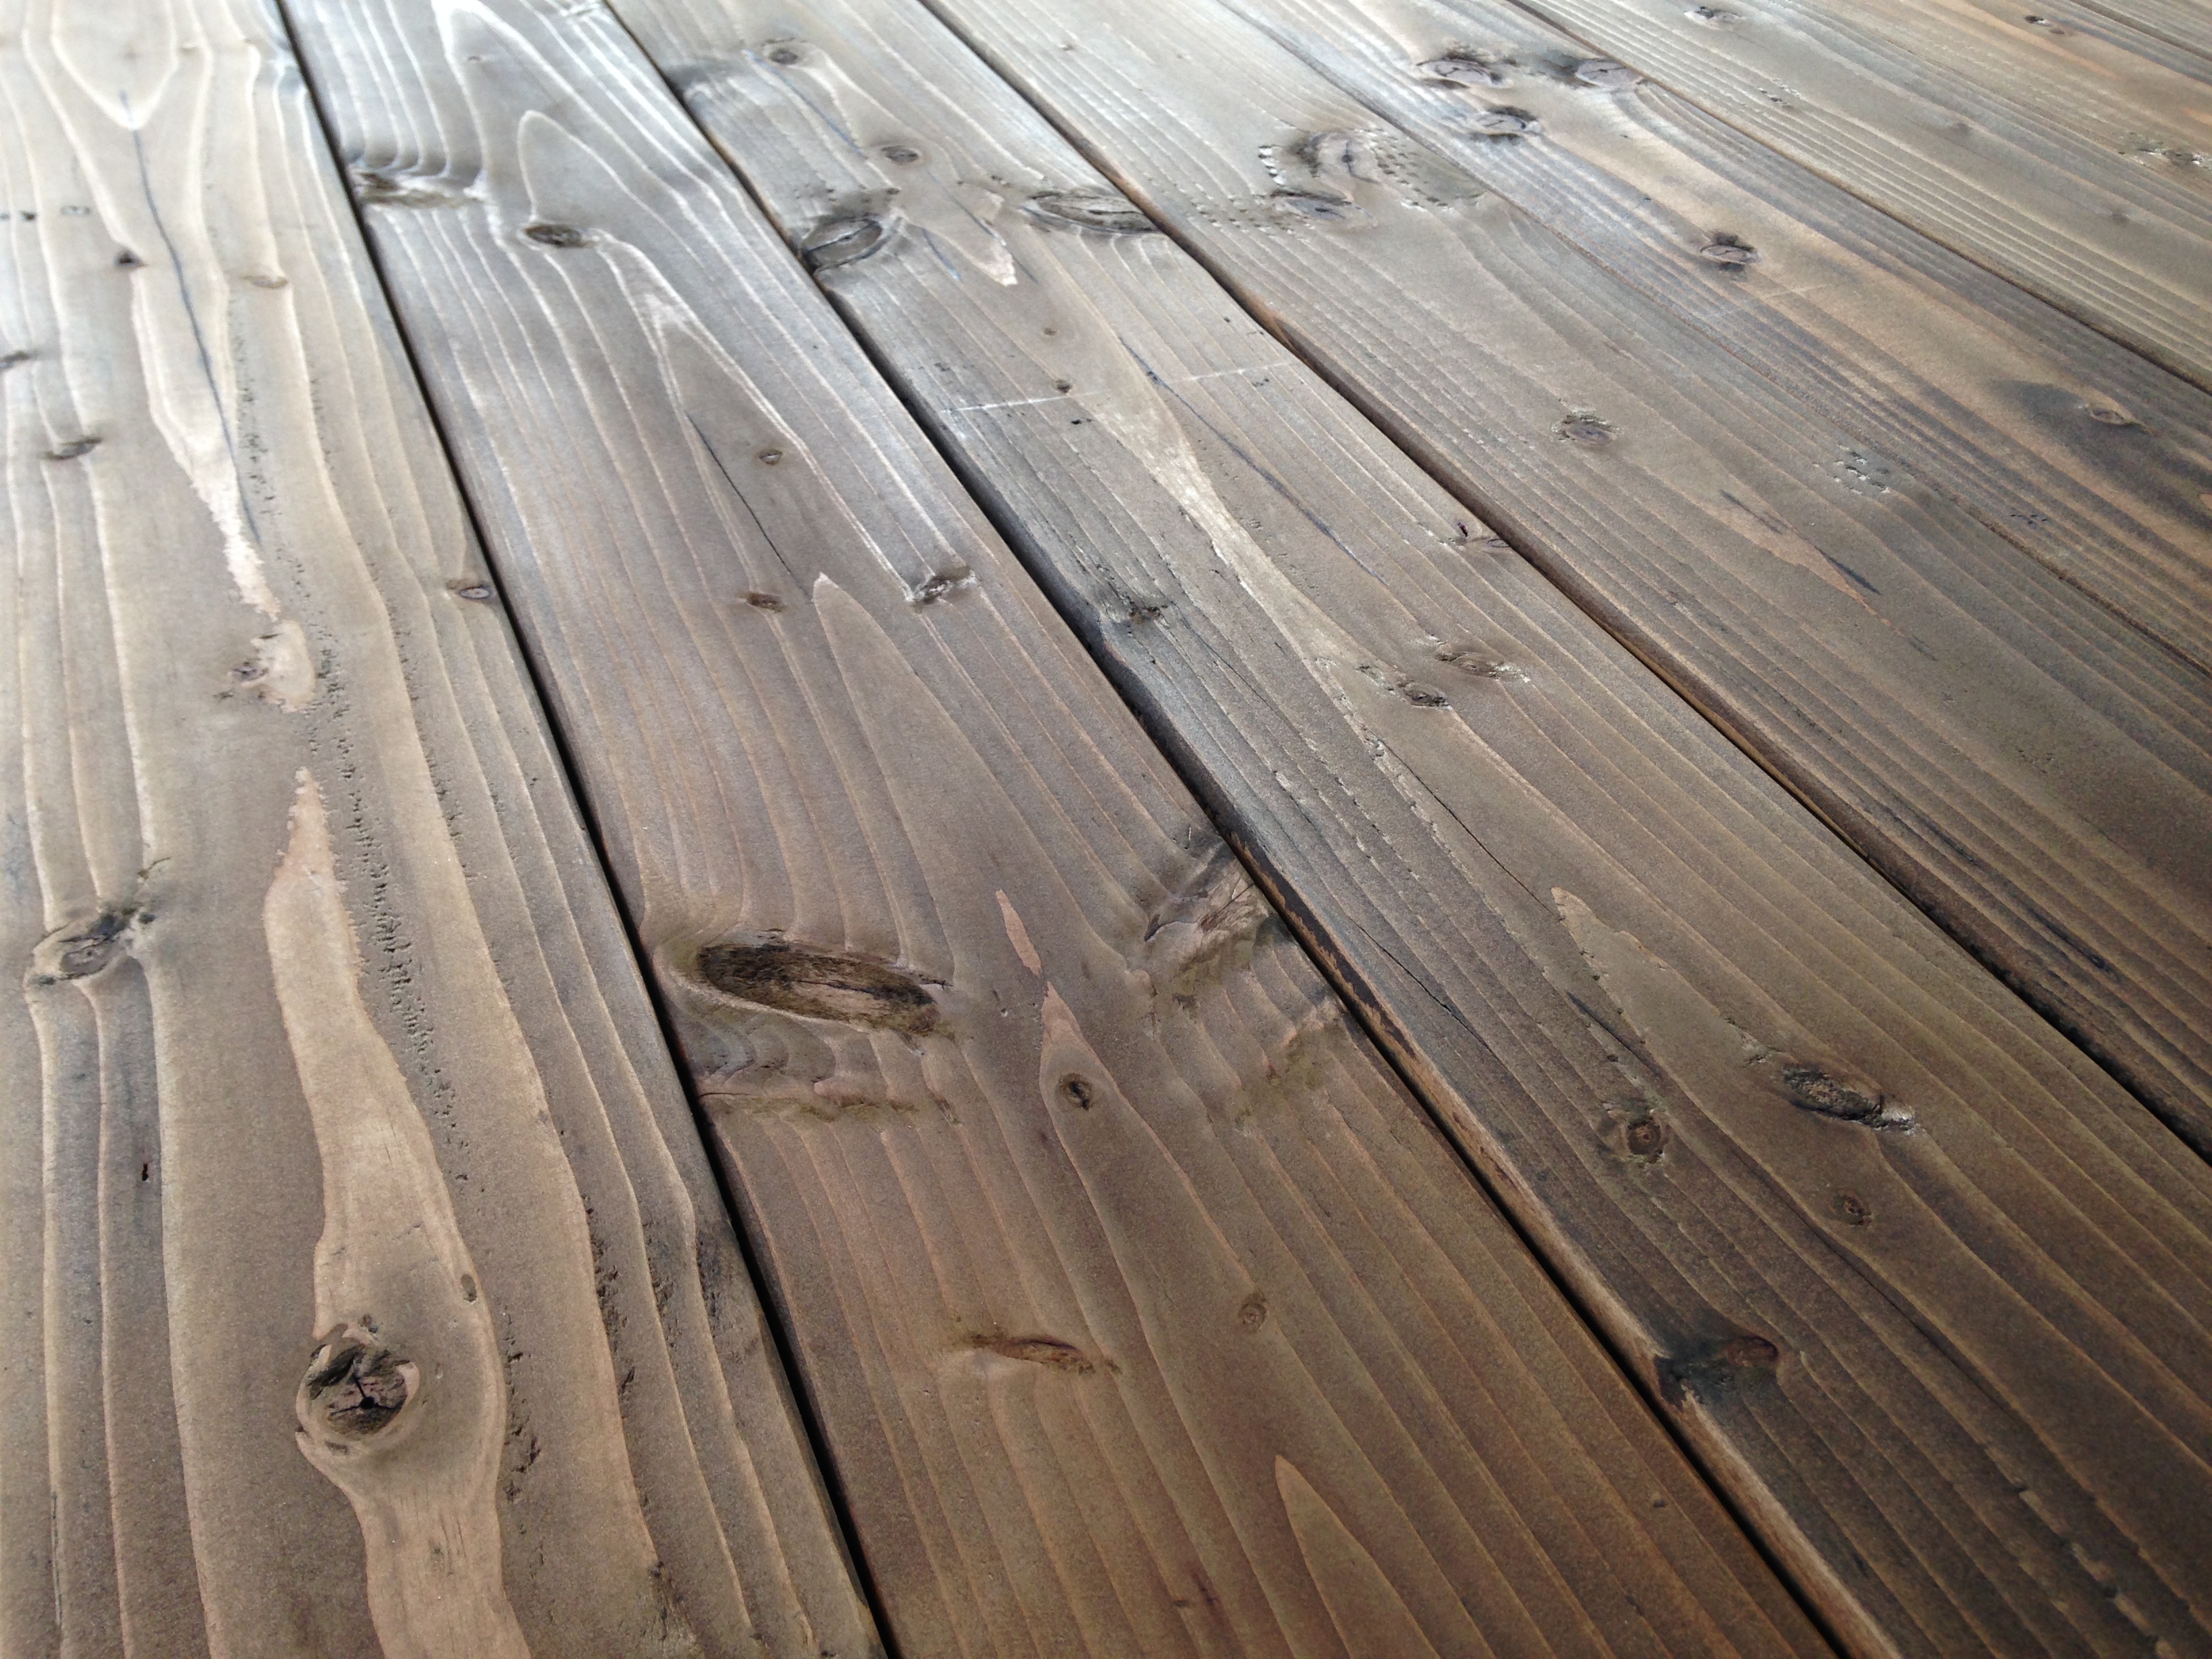
Followed the stain with 5 coats of Deft Satin Brushing Laquer. This gave it a crystal clear finish, with the slightest sheen. Really brought out the color of the stain.

IMG_0046

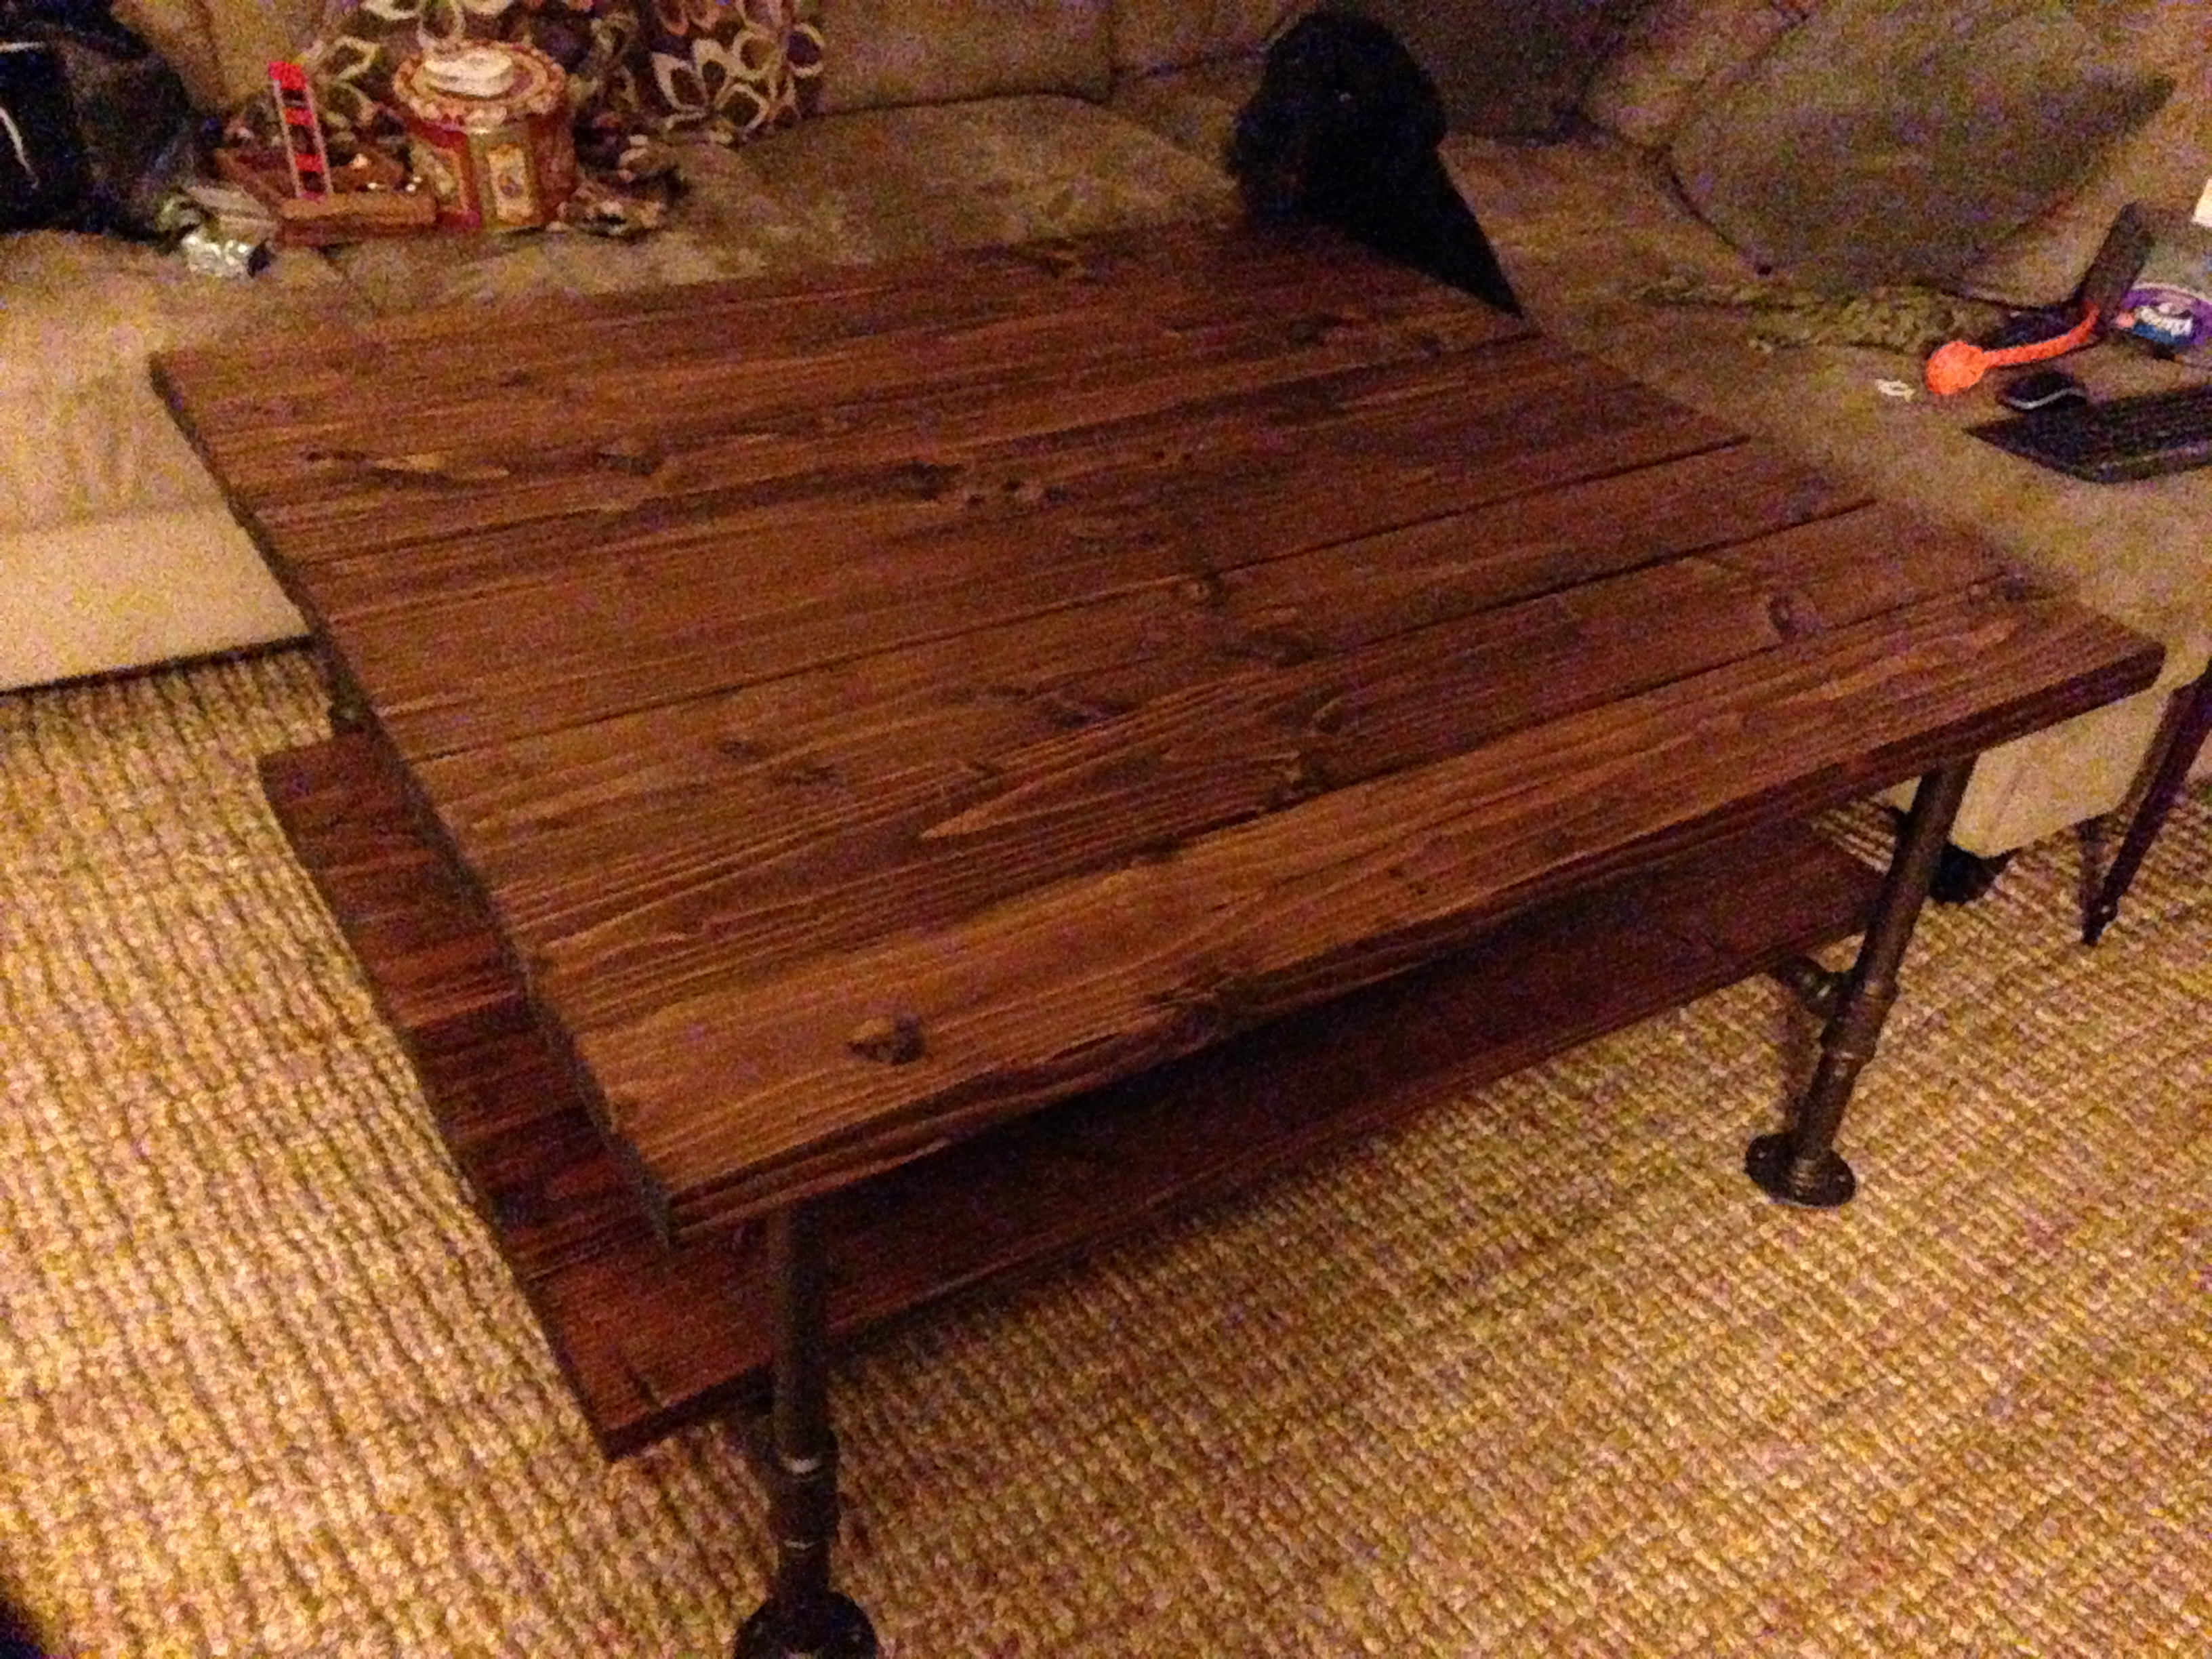
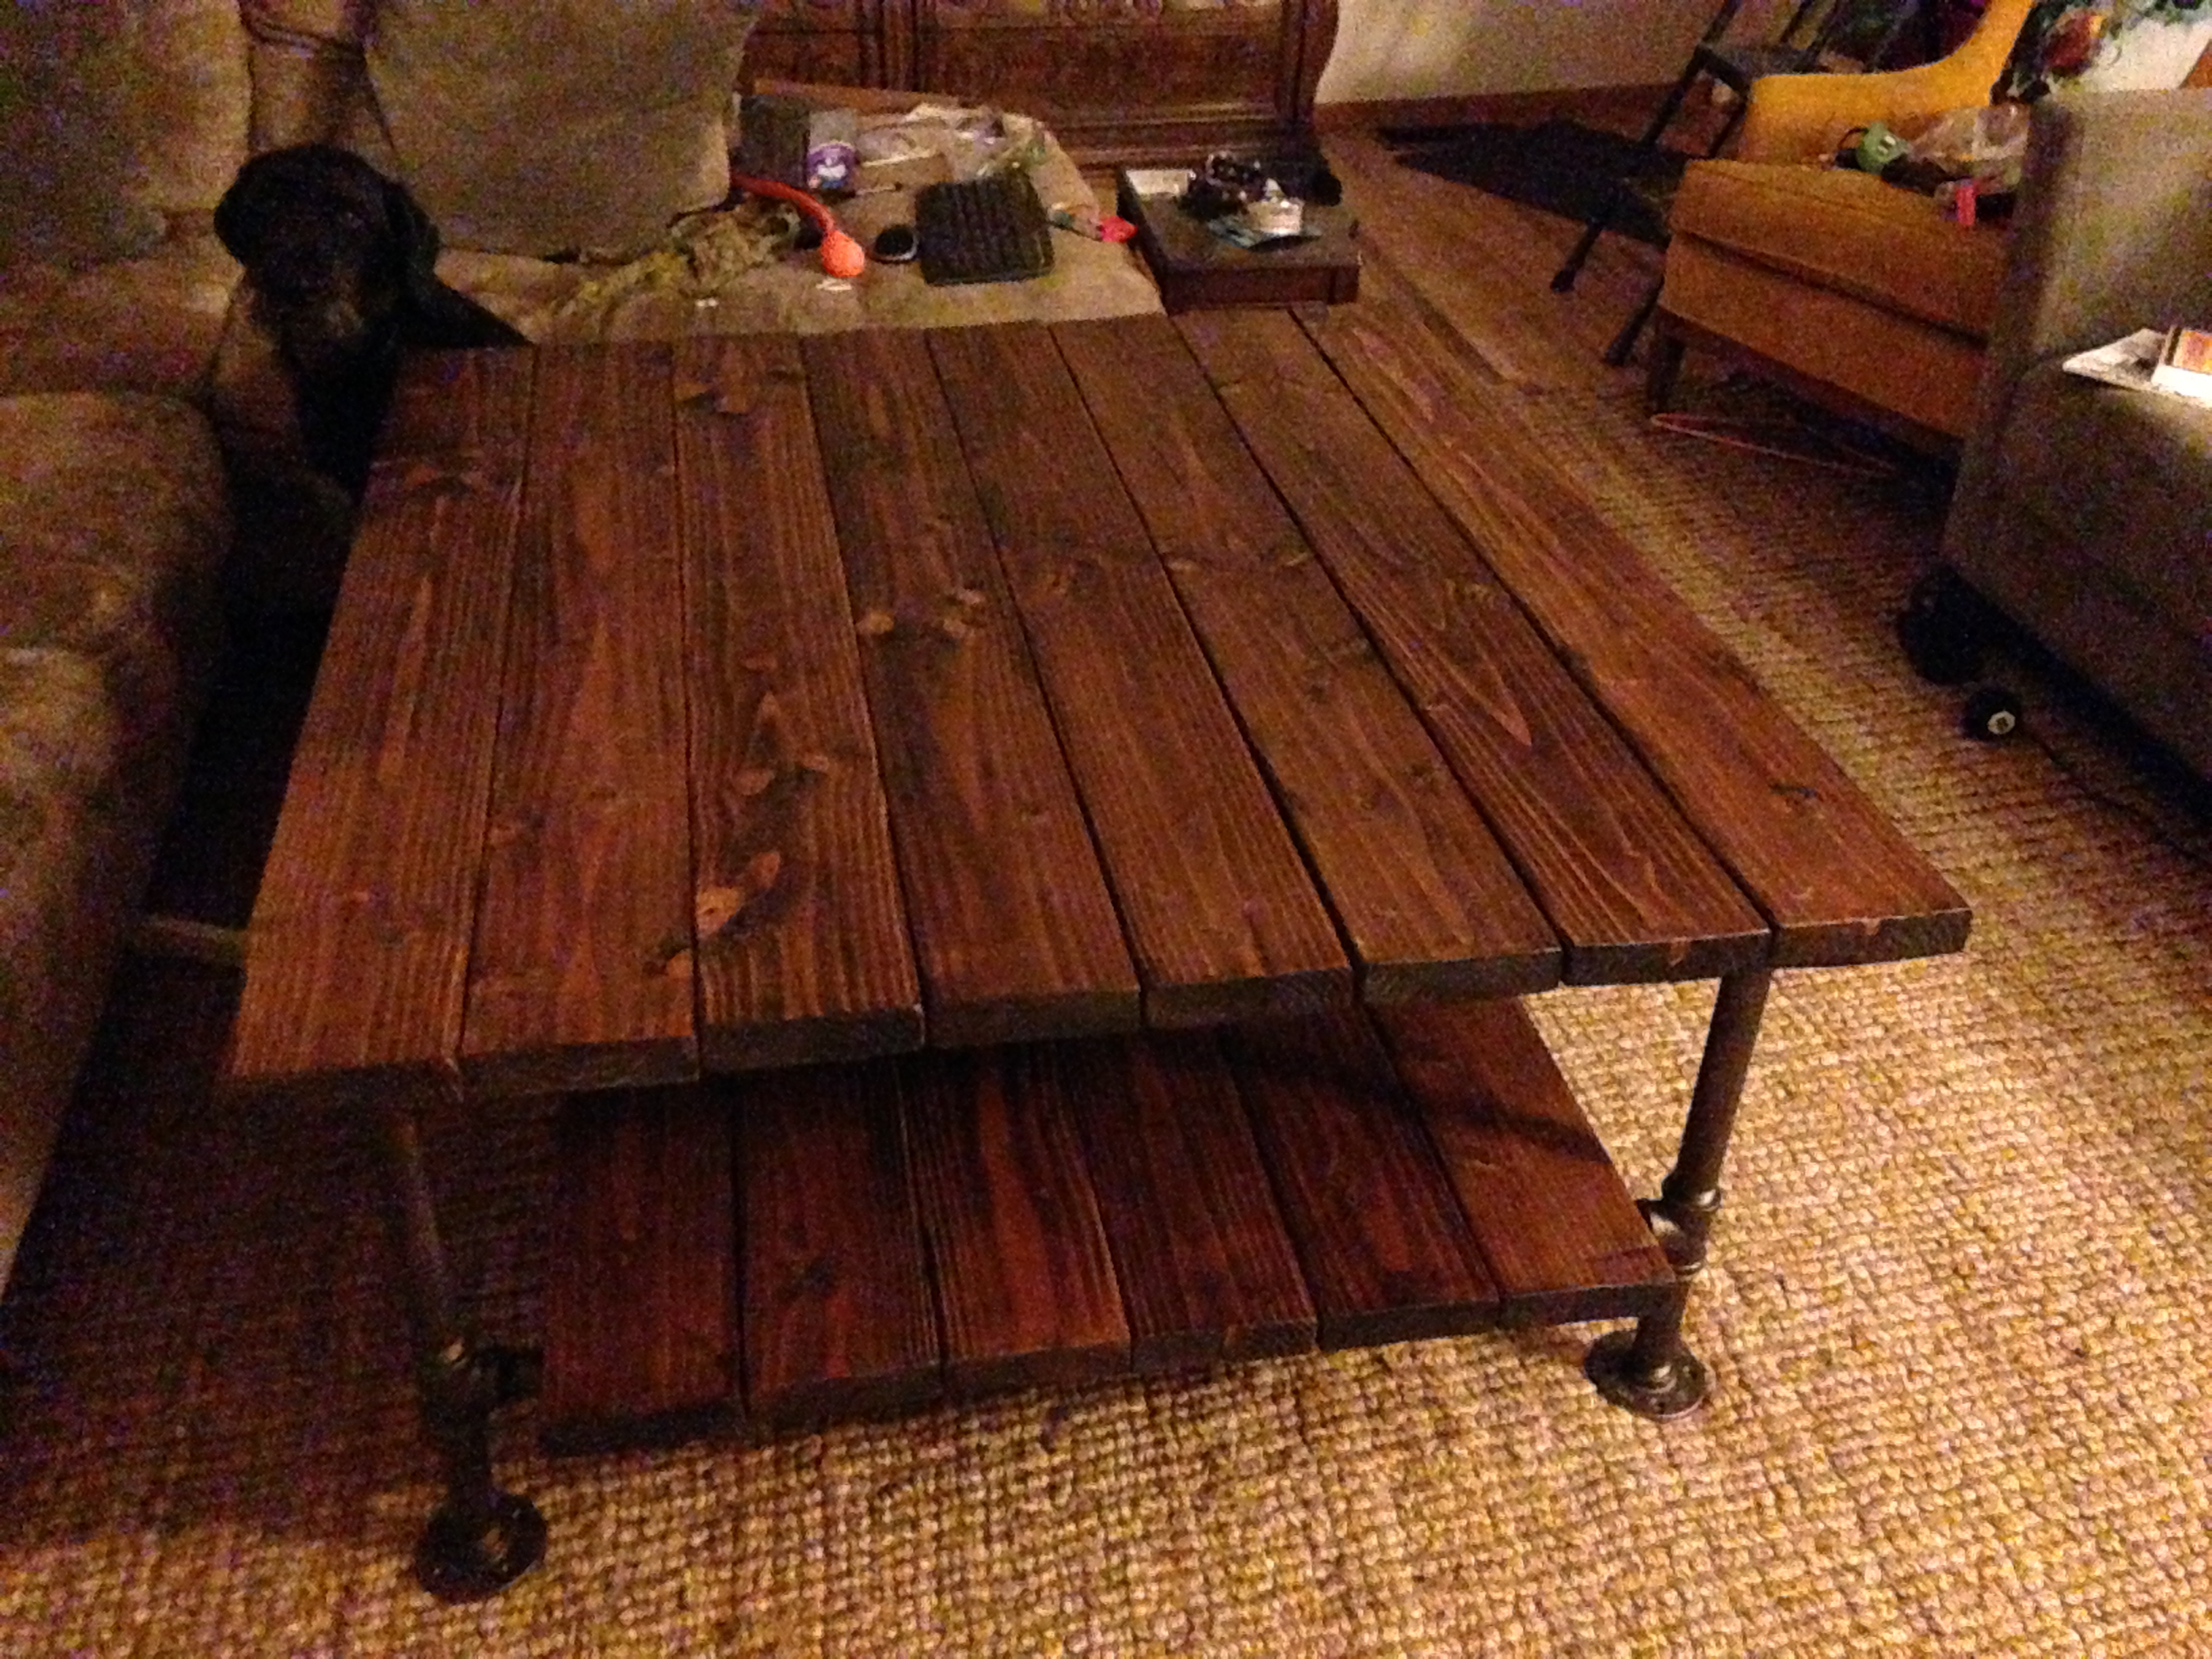
And here she is. The flanges were used to attach the legs to the table top, and the bottom shelf rests on the 36″ wide pipes, secured with pipe clamps. This puppy is massive, at ~45″x48″ and ~20″ tall, we can comfortably sit at this table and eat dinner. And there is room to spread out, then store everything underneath. I need to get some baskets to help organize the clutter, as we still tend to spread papers and miscellaneous items around the top. We are thrilled with her, and she is a huge step up from the tiny coffee table we had previously!

IMG_0052

IMG_0051

Bathroom Progress

In the six months (!!) that we’ve been in our new home, there have been many projects we’ve completed, but few have felt so necessary as getting our master bathroom in order. It is by no means finished, we have many steps until we are truly satisfied, but for now, we have eliminated (most) of the icky cruddiness leftover from the previous owner…

Step 1: Remove shower doors.

This was literally the very first thing we did upon receiving keys to the house.

During our inspection, we were told that the particular style of shower door we had in the guest bath was no longer “to code.” There were basically made of what looks like chicken wire embedded in glass, so if you were to accidentally slip and fall into the door, it would be like “falling into a cheese grater.” Ick.

It was a relatively simple task to pull off the doors and unscrew the tracks….most of the work went into scraping the adhesive and “human cheese” (as Austin so sweetly put it) off the tub.

This has been pretty much the most wretched project we’ve tackled so far…so it was probably smart to get it done immediately. It was awful. Just imagine 30-50 years of shower crud, dead skin, and adhesive. We were in such a huge hurry to make some progress on this house that we forgot to get the camera until we started the guest bath. After some decent scrubbing, it looked like this:

2013-08-02 17.22.17

Beware the human cheese….sorry if you have a squeamish disposition.

The adhesive is all that is left. Also note, as this is the guest bathroom, it was significantly less gross than the master bath. At the end of night one, we has the bathrooms squeaky clean and were able to hang our shower curtain and clean ourselves up, too.

2013-08-02 18.53.46 copy

Step 2: fix the leaky toilet.

When we got around to accessing the crawl space for Mission: No More Laundry in the Kitchen, we noted a lovely puddle hanging out under the guest bathroom toilet pipe…..o.O

Quick fix: turn off the water supply to the toilet.

It wasn’t until we had a friend come stay at our house that the importance of the second toilet became obvious.

Full disclosure: it wasn’t until having Indian food for dinner one night…

So while Austin was out of town on a job, I ran to the blue store and picked up a “full innards” toilet kit. There are no photos of this process, but it soon became clear that the innards of this particular toilet were slowly deteriorating into a fine, gooey, black, mud-like substance. I was glad it was just me, as Austin is prone to gagging at yucky things like this…and his gagging gets to me way more than any of the actual gross stuff.

The full innards replacement process was, truthfully, not too challenging…though going it alone was rough, it was doable. And after my second trip to the store (the initial fill valve I bought was faulty) we had a perfectly functioning toilet!

Step 3: Remove necessary, but dangerous storage cabinet that seems to reach out for your head anytime you come near.

And we have no “before” photo of this puppy, but you can see the corner of it in this photo. It matched the kitchen cabinets (and the current vanity in here). It seemed like I was always hitting my head on it, and we really don’t require all that much bathroom storage.

Master bath

Post removal:

IMG_0013

Bright side: looks like Robin’s Egg blue used to adorn the walls as well as the tile in the master bath! Oh yeah, we also replaced the light fixture in here with a cheap-o from the orange store. The previous one only took chandelier bulbs, and we try to have as many bulbs in our house be CFLs. The light fixture in our “dining” room also requires chandelier bulbs, so we chose to invest in some CFLs with a chandelier base and they don’t seem to work well. They’re constantly flickering, which may be a fault in the fixture itself, but it did not start until we changed the bulbs…mystery for another day.

Step 4: Replace medicine cabinet with wider, tri-view cabinet.

We had these in our last rental, and I really enjoy the extra storage space, along with ability to see the back of my hair. We currently have it surface mounted to the wall, but will eventually recess it as our long term plan for the bathroom will require re-routing some plumbing in this wall (which means the drywall is coming down) so we’ll wait to frame out the support until then. You can also see here that we’ve re-painted the bathroom. It is Behr’s “Smoked Oyster” which had some lovely gray undertones that seem to get washed out in this bathroom and it looks more purple than we anticipated. We actually like the color, but with the blue tile it is not quite right. Either way, it is a significant improvement over the filthy yellowed-white walls that were in there previously.

IMG_0010

So things are looking up in here. This room has seen a lot of improvement, but there is plenty more to be done!